In this guide of Lost Ark Valtan Phase 1 Guide for both Normal and Hard mode, we will be explaining the mechanics of Valtan Raid Phase 1, and only focus on explaining important the wipe mechanics and attacks that can deal a lot of damage.
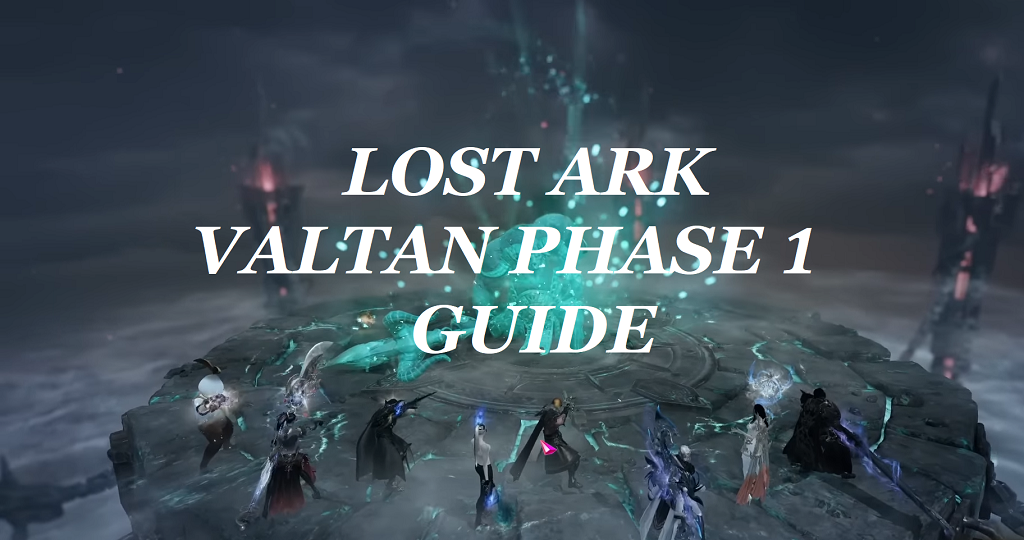
Lost Ark Valtan Progression Guide - Valtan Raide Phase 1 Mechanics
Here we cover everything you need to know about the first phase of the Legion Commander Valtan raid. We split the guide into two parts: in the first part we will cover all the essential mechanics in just 60 seconds and in the second part we'll go far more in-depth with all the mechanics for anyone who's looking for extra help.
Lost Ark Valtan Raid Phase 1 Progression Stages
The wolf will start combined then split into a red and blue wolf and then recombine at the end, the red wolf applies a stacking bleed that creates a line attack at 3-8 stacks, so cleanse this.
When both wolves are out at once they must be separated ray members will get a red or blue target on them that will draw the corresponding wolf Agros.
At x30 and x15, the white mechanic starts eight orbs spawn around the boss of alternating color and the boss starts a stagger check, you must pass the stagger check and also grab orbs in the correct order or you wipe. Typically, players grab them in this order you can skip the stagger check by having the raid leader use Wei for bonus stagger while the other party members kite their orbs.
After the second stagger, the boss will recombine with all abilities as you finish the fight.
Now let's dive into the first phase of the Valtan legion raid with more detail and without the time restriction:
1. Gear Setup For Valtan Raid Phase 1
Let's go over the overview items to bring for this fight are a panacea and sacred charm as the red wolf does apply a stacking bleed that is excellent to cleanse and clean off yourself as well as a fear later on in the fight, you can bring whirlwind grenades and it's recommended for the two stagger checks that can wipe you and of course, time stop works in almost every encounter. Prepare some Lost Ark gold now!
2. Sidereal Skills (Summons Mechanic) For Valtan Raid Phase 1
It's basically like a limit break or like a party-wide ultimate the bar will fill up in the top left corner of the screen, and when you fill this bar all the way up you, the raid leader will get the option to use one of the three summonses for some effect during the encounter.
Just playing the fight usually will fill the bar and for later on which is more important in phase two you can also pass counters or successfully counter bosses to fill the bar faster. Your three options are Thirain, Wei, and Balthorr, and they all do different things but let's simplify what their effects are:
Thirain is your big damage dealer, he does more damage than Wei and of course, Balthorr does more of a protective effect. He is your damage dealer, so if you feel like you're doing the mechanics properly you would want to lean on Thirain just to get through damage checks and kill the boss faster.
Wei, however, does a little bit of damage, it's a moderate amount of damage but then he applies a big chunk of stagger. Since this fight has two major stagger checks, we are guessing that early progression for people that are just learning this legion raid will lean on Wei for those staggering checks. If you plan it out properly you can use it on both although, it's pretty hard to get the meter to line up just right you can also just pick one of the two and use Wei on it in order to get the stagger check passed.
Balthorr gives a damage reduction to everyone around, it prevents all-white mechanics you can't be one shot and it does give you CC immunity for most CCS like push like knockback and stun like that.
There isn't really anything in the first phase that you'd want to use Balthorr for, but he comes in super clutch on several occasions in phase 2.
Note: Only the raid leader can use these with control Z, control X, and control C by default, if you ever need to transfer if the raid leader is dead and you're close to finishing you can transfer the raid leader to someone who's alive and they should be able to access it mid-combat.
3. Survival Mechanics and Strategies for Each Stage of Valtan Phase 1 Raide
Let's dive into the big gimmick for the fight, the thing that is going to probably be the most challenging at first for people before they understand how it works and that's going to be the stagger checks that happened at x30 on the health bars and then x15 as well and then it will follow with a stagger check in the middle of the screen:
Stage 1 - Orbs Mechanic
Before you begin, you want to set everyone up with their positions, the easiest way to do this is to use a clock pattern, so all eight players are distributed in a clock pattern skipping the 1263 positions. This is where the orbs will spawn which by the way is a good reason why we use clock positions instead of just north, west, south, and east because then you can actually use a little bit more precision as you place your players here.
At x30 and x15, the stagger shack will start, the wolf will spawn in the middle, start a stagger check, and then you'll see these orbs spawn all around you. So again these are the positions that you'll find the players in that you just started at the beginning of the fight.
Strategy 1
You have two major goals that you can choose to accomplish in whatever way you want:
The first is you need to pass the stagger check or it is a raid wide wipe, so if you do not pass this stagger check-in time, you will wipe.
The second goal is that you need to grab the orbs in alternating color order, if you break the order it will be a wipe
So with those two things in mind, here is the most popular strategy for solving this:
Since you're already in that order, all you have to do is just follow the clock and let the person in the one o'clock position grab the orb and attack the boss
Then two o'clock grab the orb and attack the boss, then four o'clock five o'clock, then seven and then eight, and then usually by this point, the stagger check has been passed.
Then in the positions at the top for 10 and 11 they just have to make sure they don't grab their orbs, they just kind of around and you should have the stagger check.
For this reason, it's good to have players in the first three or four positions have their highest stagger, so if you have destroyers, scrappers, artillerists, gun lancers, berserkers, sorceresses, any one of those that have really high stagger. you'll want to put that up front because you'll get through the stagger a lot quicker.
For every stack that you get as well, it will increase the stagger done, so for the players that are, later on, you want to put your lower stagger players later on, and then when they do pick up the orb, they'll be able to activate and go into the boss.
Note: on the boss itself, it does have a stack for every time, an orb is collected, so if you are number six in the order and you see that six is up ready to go for the orb thing you can grab that based on the debuff.
Strategy 2
Remember you will be able to use Wei on at least one of these based on the timing, so you'll be able to activate Wei to give a big chunk of stagger, so what some players do as a strategy is they will just have the raid leader grab one orb use Wei right away and that'll immediately break the stagger or do about 80 percent of the stagger bar, and then they can just finish off with a whirlwind grenade with a singular buff, that's enough for you to break the stagger.
Strategy 3
What sound teams will do is a strategy called All Six, which means that all players go to 6 o'clock down at the bottom of the map, so all of the players are coming down here at the very bottom, and at the very top is the raid leader all alone, then you're just going to have them kite the orbs, so that's one way to pass the check. A lot of teams will use this early on this way does give you a nice chunk of stagger, the only thing to think about here is that if you're not going to be using thigh rain, you won't get a big chunk of damage and so you will make sure that you have to deal enough damage to push him through the phases without the mechanics getting too much to bear.
Stage 2 - 50X Wolf Phases Mechanic
Let's go through each of the phases and talk about the individual wolves mechanics that you'd like to know it will help you defeat this boss:
It will start out at X50 as the purple combined wolf and the mechanics here are very straightforward. Most of these old figure out just by facing them and watching them happen, but once you get to x45, he will transition and split into two wolves: the red wolf and the blue wolf.
The blue wolf has tons of attacks that apply a stacking bleed, so you want to be dodging these as much as you can, especially even if you're a tanky class like a gun lancer or a destroyer, don't be tanking hits because when you get to three stacks of the bleed, it will trigger a line attack that will attack across the arena and can hit everyone else in your group as well. So if people are getting hit by the bleeds too much and stacking up too much, you'll see these AOE triggers and start dealing damage to everyone along the way. Anytime you see one of these lines shoot across the screen like this it means that someone hit three stacks and then a big attack will come across, so just be wary of that make sure you're dodging those, and if you have to use panacea or sacred charm to bring the stacks down.
1) 45X Red Wolf Mechanic
A special attack for the red wolf is going to be the tornado and how this works is he will create two zones. He will spawn as a tornado here in the middle and become a tornado himself, and then he'll create this circle around the outside that does have a knockback on it, so you'll have to dodge through it to get through it. This is super important because if you get too close to this tornado, he actually wrecks - this tornado does so much damage, if you let it get close to you, it'll shred your HP bar, you want to be very careful about staying away from it.
Usually what people will do is if they're in the group that has the red, they'll either run around if they're being targeted or they'll just dash outside the ring and then wait for it to end.
2) 40X Intruder Mechanic
Next, the blue wolf will spawn as an invader, he is the intruder in this case and then you will have two wolves on the screen at once, you'll have red and you'll have a blue and a few things happen once this triggers:
First is you can the Agros for each of these bosses are no longer random, so the red boss will choose a player and put a marker across here above their head, and then the blue boss will do the same.
So you'll have two players in your raid that have a mark over their head, if it's red it means the red boss is following you, and if it's blue it means the blue boss is following you. Typically what people will do is they'll do red at the top of the at 12 o'clock, and then they'll put blue at the bottom of the screen.
The reason you separate these two is if they're next to each other, they do have a buff that will reduce damage taken and generally just makes it hard to complete the flight, so you have to keep these wolves separated, and generally red will just take over the top and then blue will go to the bottom.
However there's an additional mechanic in this and that is the golden buffs, you'll actually see that a couple of members of your party will get a golden buff at random and they'll glow gold as well, so if you are glowing it means you deal bonus damage to whichever wolf is intruding
so first you fight the red wolf and the blue wolf intrude so the golden buff will deal damage to the intruder and then later on when you're fighting the blue wolf, the red wolf will invade and it will be reversed.
If you have the golden buff you do more damage to the intruder and you're unable to damage the other wolf, so an easy way to test this is either to look at your buff bar, see if you have the gold or look at the glow around you or what some people do is they will just attack one of the wolves. If they see the damage, they know that they're good to go, if it says no effect it means that you have the gold buff and you go attack the other wolf.
You pass this phase by dealing enough damage to intruder to make them retreat from the fight and you're good to go you'll keep fighting the wolf that was already out.
3) 35X Fear Mechanic
Next 35, the red wolf will start applying a stacking darkness debuff on you. When this gets to five stacks you will be feared, you'll be mesmerized locked in place and then the red wolf will start grabbing people that get this debuff so you can cleanse. With panacea, you can help your teammates with sacred charm and then gun lancers and paladins can help cleanse it as well, so if you get five stacks of the darkness buff this is bad you'll get grabbed up, so while you're managing the bleed stacks make sure you're also managing your darkness stacks, and if anyone gets locked in place make sure you break them out of that mesmerize and then you'll get out of the way because they'll be dashing through and grabbing people.
4) 30X Blue Wolf Mechanic
At x30, you'll get the stagger check mechanic, then the red wolf will disappear, the blue wolf will enter, and the fight will continue just in reverse. The blue wolf will be your main target and then eventually the red wolf will invade, and you'll have to do the same mechanics again.
Now the thing to know about the blue wolf is that he has this elemental claw on his arm, it will start out with no glow, then it'll start glowing and he'll do different attacks based on what glow color it has. So if you see he's doing just normal claw attacks moving around with no glow there, but then as it starts to glow, you'll start to see a blue glow a green glow, or a red glow.
When you see the blue glow on his arm, that means that he has an ice attack primed, when he attacks with this, he'll shoot out a whole bunch of ice projectiles in all directions that will freeze you, so you'll want to avoid them and don't get frozen. To avoid these when these come out, you can dash into them or like to get just kind of like a long distance away, but you can also if you're really quick on the draw you can see where the projectiles they launched into the ground were, you can kind of see based on their positioning where there's going to be gaps, so you can stand in between.
If he has red, it will do big AOE explosions, so you'll see a trail comes down and create these red like molten patches on the ground. After a short delay, these will explode and deal massive damage, so when you see the red attacks, you just got to get as far away as you possibly can; or you can shield, time stop it if you have to, that may be the easiest way to deal with it. But if you see red try to get some distance and avoid the explosions.
The green function just like the red and the blue again, he'll throw down these little markers that land on the ground, and the green is the inner safe area, so for each green, you'll have this kind of like an inner circle that's safe and then this big AOE will go around it. So what you have to do is find a situation where there's green on the ground that's by itself and then you want to stand on top of it, so you can stand like assuming these are green you can stand right next to it or you can just try to outrange it.
Stage 3 - X25 Mechanics
At x25, the red wolf will come in as the intruder and as we talked about the buff will reverse, if you get the gold buff you'll deal more to the intruder and you want to make sure that these are separated because if they're standing next to each other, they will get the armor the protection you won't be able to deal damage to them.
To separate them, move one to the top and one to the bottom, then kill them down. And if you have a buff try to focus on the intruder because if you're doing no damage you can switch.
Stage 4 - X15-0 Phase Mechanics
At x15, he will do the second stagger check with the orb, so he'll do this big attack, spawn in the middle of the map, and then start doing the stagger check. Typically for this one, this strategy is where people will use: Wei just because it's later on in the fight, you'll do a big stagger bonus, chunk him down and then finish that.
What happens is right when you pass this stagger check. You'll go into the final phase of the fight - the red and the blue will recombine back together into the purple, and the purple wolf will have all of the attacks of the red and the blue combined, so it'd be avoiding everything. Still, you got to be careful about the transformation.
When we hit 15, we pass the stagger check here. When he recombines into purple, he'll do this big room-wide AOE and start exploding and sending projectiles out everywhere. He'll have this big AOE around him that you want to avoid, and it'll start sending these projectiles in all directions and start dealing damage.
So what you want to do is as soon as you see 15, you just pass the stagger check just start spreading out, go to the edge of the arena, watch out for the AOEs, and then you want to slowly work your way back in. These projectiles will shoot out, and he'll do AOEs all over the place, so it's straightforward to get caught in all these and start losing players when he transforms. Then he'll be in the purple state, you'll be doing both the bleed stacks, and all the red effects of the red wolf and then all the effects of the blue wolf as well, and you'll finish out the fight all the way until the end.
An advanced strategy where you try to use thyroid on both wolves when they spawn, so you have to pull them just far enough apart where they won't get the buff on them, but close enough where Thirain's attack will hit them both, and you'll get crazy damage scaling out of that. But once you reach this point in the fight, it's just about dodging mechanics, he stays keeping alive, making sure that you're not dying, and then finish the boss off.
Periodically through the last phase, you'll see him slam the ground, make this big purple explosion, and then he'll mark one player when he does this in the raid who will then be feared when he's done. When that person gets feared, they want to ping themselves aggressively, so that everyone in the raid stacks up on top of that person and gets right in the right position. Because what will happen is when that person's marked, he will blink on top of them and then start a stagger check, so you want to get together, pass the stagger check really easily, you'll stand on top of each other past the stagger check and then you'll just continue the fight as normal. The person that gets marked can also use an awakening or a dash or cleanse themself if they get hit by the fear and then just ping themselves so everyone knows where to go, and then you pass the stagger check.