Elden Ring just got updated to 1.09 a few days ago, so there are plenty of new subjects to talk about. Today, we are going to be presenting an Elden Ring paintings tier list 2023, ranking all Elden Ring paintings from worst to best. These paintings are expertly crafted, carefully composed, masterworks one and all, an incredibly detailed sight of the Erdtree and full Majestic Glory, an exemplary portrayal of the academy and its commanding influence. We also discuss what are the paintings for in Elden Ring, where to find every painting and their artist in Elden Ring 2023.
Elden Ring Paintings Guide - What Do Paintings Do In Elden Ring?
Elden Ring contains a series of seven paintings that depict the various landscapes from The Lands Between. Then what are paintings used for in Elden Ring?
The paintings act as treasure hunts. The Wandering Artist Spirit's Paintings depict specific locations you'll have to find in order to meet the spirits of the artists themselves. Upon finding and inspecting one of the seven drawings, a ghost of the artist will manifest at the location from which they were painted, granting a specific reward. Note that the painting location you must seek is not the structure or landscape depicted itself, but rather the spot the artist would have been when painting it.
Elden Ring Paintings Ranking Tier List 1.09 (2023) - All Paintings Elden Ring Ranked
Check the below Elden Ring paintings & locations ranked by tier patch 1.09, from D to S. We list all paintings rewards, locations, and solutions.
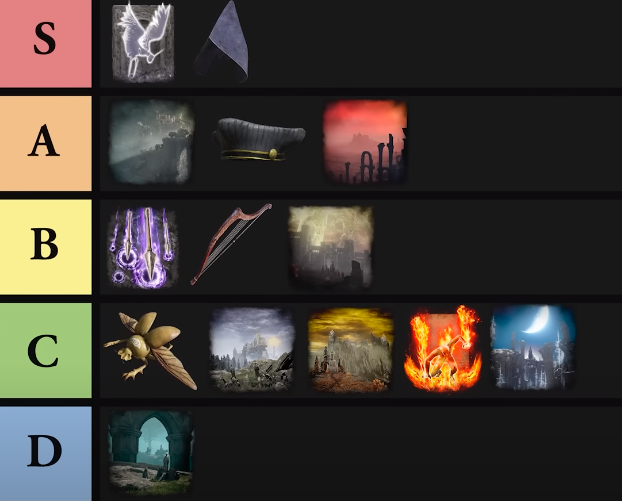
D Tier Paintings Elden Ring
Homing Instinct Painting
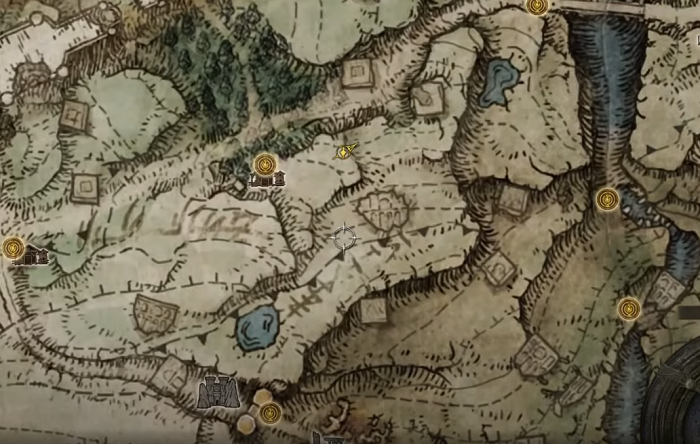
- Location: Artist’s Shack (Limgrave)
- Solution/Artist’s Location: Northwest of the Seaside Ruins Site of Grace, south of the Dragon-Burnt Ruins
- Reward: Incantation Scarab
They say your failings in life make you stronger and if that's the case then whoever painted this piece should be harnessing the Chaos Emeralds by now. Death and existential dread are common themes in modern art, they're the perfect excuse for you to wake up sad every morning and there is ubiquitous as cover shooters were in 2013. And what better imagery to manifest that dread than a pile of eroded tombstones almost as if the painting itself is yelling time swallows all your death doesn't matter. The piece has some strong vertical continuation with the upwards pointing tombstone, the two vertical lines created by the archway, the tree and the eroded chapel in the distance, but the arches really bothersome to us, it makes the continuation too strong and creates this giant arrow that leads our eyes straight off the painting. The whole setup of this piece would have been significantly better if the giant archway just wasn't there to begin with.
C Tier Paintings Elden Ring
Resurrection Painting
- Location: Artist's Shack (Liurnia of the Lakes)
- Solution/Artist’s Location: In the graveyard southeast of the Behind Caria Manor Site of Grace
- Reward: Juvenile Scholar Cap, Juvenile Scholar Robe, Larval Tear
The painting looks well crafted and well thought out, the Resurrection painting and the execution of its ideas are great, but that doesn't necessarily mean we like it, particularly the reason the artist felt the academy deserves to be put on such a nice looking pedestal when in actuality. The pedestal it sits on is crafted from the false promise of diversity and absurdly high intuition rates. You can see a minor Erdtree in the background as though it's trying to communicate the idea of having a nice view outside, while the principle is projectile vomiting space lasers down your throat.
Champion’s Song Painting
- Location: Shaded Castle
- Solution/Artist’s Location:
- Southwest of the Rampartside Path Site of Grace, up on this cliff you fight Ancient Dragon Lansseax
- Reward: Harp Bow
The champion’s song painting has a lot going on, the obvious major focal point here is the hero's grave guarded by the black knife assassin. That's conveniently left out of the picture, maybe because she was feeling insecure that day, but the piece does seem heavily weighted to the left without much going on anywhere else. However, the angles of the mountain slope slowly guide the viewer's eyes towards the left of the painting, not only comfortably leading them to the hero's grave, but also the distant volcano men are far in the background. It's one of the paintings of all time.
Sorcerer Painting
- Location: Castle Sol
- Solution/Artist’s Location: Southwest of Castle Sol, on the side of a bridge northwest of the Stargazer's Ruins
- Reward: Greathood
More vertical continuation, but this time the layout is pointing directly upwards to the moon. It's a piece of grand scale that aims to communicate one thing. Look at how big this moon is, this was the same moon that Rennala herself gazed upon. The height and size of the moon presiding over everything else in the scene, lends itself to this moon's power and influence. Overall, it's a C tier.
B Tier Paintings Elden Ring
Flightless Bird Painting
- Location: Leyndell, Royal Capital
- Solution/Artist’s Location: At the edge of the cliff south-southeast of the Windmill Heights Site of Grace
- Reward: Fire's Deadly Sin
The Flightless Bird painting is a gentle Journey that begins at the bottom and steadily guides the viewer upwards, towards the Erdtree with vertical continuation at the trees, then up towards the castle wall. And finally the Erdtree itself as it extends far off the painting to convey the throbbing majesty and size of this tree. The branch is slowly pointing back down and tickling the castle walls, really just show you how massive this tree is. The whole existence of this painting is to show you that the tree is King of mountain and it takes no criticism. There are no tricks involved, no sleight of hand or nft scams, there isn't a dragon spawning behind you threatening to shove a thunderstorm up your ass. The downward angles of the branches gently guide you back down to the castle walls, almost as though you can climb them yourself if you wanted, enforcing a never-ending cycle of climbing up towards the tree and then being gently let back down for all of eternity.
A Tier Paintings Elden Ring
Prophecy
- Location: Stormveil Castle
- Solution/Artist’s Location: Behind the Church of Pilgrimage
- Reward: Warhawk Ashes
This painting uses more height and vertical continuation to convey the height of the piece. The painting says struggling with that weird cognitive dissonance of whether or not, it wants to push us over the edge just to see what would happen. The strong upwards diagonals formed by the Cliffside that naturally lead your attention to the castle in the background. It's not driving home some grandiose message about how all our accomplishments will amount to nothing, because even the brightest paintings become dust one day. Someone just got really inspired by some trees and they loved them so much.
Redmane
- Location: Sellia, Town of Sorcery
- Solution/Artist’s Location: Northeast of Fort Faroth, on the lower cliffs southeast of the Minor Erdtree (Dragonbarrow)
- Reward: Ash of War: Rain of Arrows
The real allure behind the Redmane painting is that the artist was more enticed to paint Redmane Castle way in the background while leaving all the negative space in between the columns and the foreground and the castle, that's a good few nautical miles away. The lack of detail gives a sense of wonder if, it communicates all the dangers of the land of cuddly times that is Khalid in a single perspective, and its one single aim as a painting is to make sure you do not pick this place for your annual family vacation this summer. The vertical continuation of the columns and the distant horizon line formed by the desert work together to draw your eye to the castle. As though it's warning you that this is the only proper rest stop in the entire desert and the next gas station is 53 miles north. The shorter column symbolizes the cathedral-sized amount of you've signed up for upon entering the wilds without preparation. It's raw and it's real, it's not afraid to tell you it has nothing to offer and that if you come to near it you might start getting dizzy breathing in all the fumes.
Elden Ring All Paintings Rewards Ranked By Tier
Incantation Scarab (C-Tier)
These scarabs roll clumps of incantation during their labors. The opinions on helmets like this are often very polarizing, either it's literally your child and you will cherish it so much, you modded into the next 5 games you end up playing or you've already bombed at the side of it. It removes 15% of the FP cost for all incantations. If you're lucky, you can get away with casting one or more incantation than you'd normally would. And you're taking 10% extra damage too. So it's probably going to be a health top off and not something awesome like a Dragon Laser. 10% extra damage might as well be getting coughed on harder up until you get to Altus. But any point beyond that and your enemies bring out the health nukes and start becoming an actual problem. It's fine, but you deserve better.
Fire's Deadly Sin (C-Tier)
This incantation is now useless, but that's just because with one or two exceptions, it was pretty much always useless. So put it in the C tier.
Rain of Arrows (B-Tier)
The reward you get from Redmane is the reign of arrows ash of war. It's a niche pick for sure. It's not going to be used as prolifically as bloodhound step or cheat engine, but that's not to say it doesn't have its proficiencies, it takes out dragons and magma worms like HBO cancels shows and it's great for inflicting status ailments onto anything stupid enough to stand right under them. It's a pretty great ash of all things considered. The only reason we’re giving it a B is because of the reckless disregard for life during the Olympic Mountain scaling expedition required to even get to the artist in the first place. This doesn't feel like platforming from soft, it feels like speed run tech.
Harp Bow (B-Tier)
This bow is one of the greatest, it's great for a bard build even if the damage is pissing with mediocrity. Barrage is nothing special unless you just want to turn yourself into a status cannon for about 5 seconds and there's nothing against that.
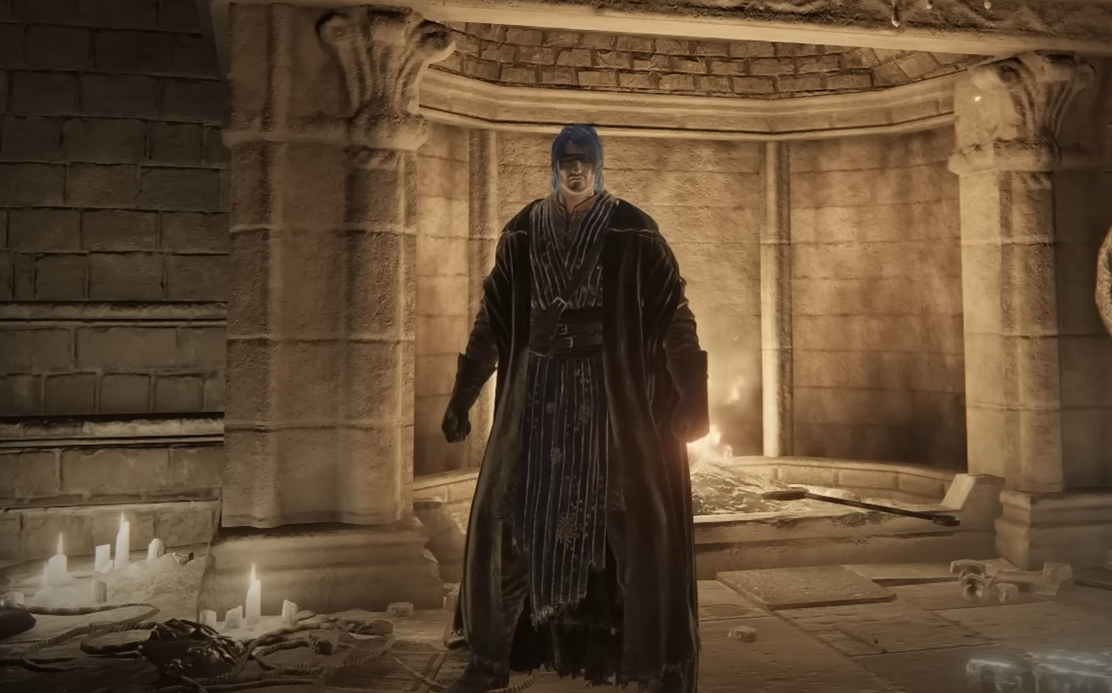
Juvenile Scholar Set/Larval Tear (A-Tier)
This is the sorcerer respect package, you can buy it off the fromsoft battle pass for 10 bucks. But if you successfully find the paintings location, the game will just give it to you for free. A set of juvenile sorcerer clothes and a larval tear in case you made the grave mistake of grinding your faith up to 40, only to get to Altus where every living organism on God's cursed Earth starts eating lightning and prayers for breakfast. And it literally doesn't stop for the rest of the game. The juvenile scholar set has some weird about rebirth and the description which is supposed to hint to the idea that larval tears allow you to respect in case you didn't read the larval tear description by itself that just tells you that's exactly what it's used for. There are so many somber stones and smithing materials in the game that you can easily end up maxing out 3 or 4 different weapons just by complete accident by the time you're finished. There's a total of 18 in the game each run and you are going to need all of them by the time you reach NG+7, because whatever strategies you had during the first couple runs eventually just give way to retool in your entire build once per Legacy boss, so nothing one shots you.
Greathood (S-Tier)
This doesn’t look good with anything, this looks ridiculous, but it's the type of ridiculous that's easy to appreciate. Like unlocking the beam saber in Silent Hill 3. Oversized helmets have always been somewhat of a staple in these games, so in this regard, the Greathood either deserves an S rank or it just shouldn't be ranked at all.
Warhawk Ashes (S-Tier)
Breath fire, if you don't mind the bird having a push pin for a head, the Warhawk summon is the perfect distraction that seems to outclass most others in its tier in multiple ways. It doesn't do too much damage, but it has the ever coveted utility of being able to fly over all its problems. Most of the range summons are fussy little stuck-upbabies that can't even distinguish a dragon from a marble pillar, let alone aim in a straight line. And most of the melee summons are either way too weak to even acknowledge or they punch a hole through whatever looks at them funny like they just dry swallowed fistfuls of horse pills for breakfast. The Warhawk is a nice middle ground when it feels like it does just enough, it's not a pushover, but it's not carrying you through the game on its back either.