Path of Exile 2 0.4 brings new skills, balance changes, and challenges, especially for Solo Self-Found players. SSF is a unique way to play PoE 2, where you rely only on your own finds and crafting. No trading, no partying—just you, your skills, and the world of Wraeclast. In this guide, we’ll break down the top 3 strongest SSF builds for PoE 2 0.4 The Last of the Druids (Fate of the Vaal).
PoE 2 0.4 SSF Builds Guide 2026
Solo Self-Found (SSF) is a game mode in PoE 2 that lets you play completely alone. When you create a character, you can check the “SSF” box (unlocked after rescuing the Scion in Act 3) to enable this mode. SSF is all about self-reliance. It’s harder than regular play, but many players love the challenge of building a powerful character from scratch. Here’s what SSF means for your gameplay:
No trading: You can’t buy or sell items with other players. Every piece of gear, skill gem, or currency you use must be found or crafted by you.
No partying: You can’t team up with other players to fight bosses or clear maps. All content must be completed solo.
Separate league and stash: SSF characters play in their own league with a unique ladder. Your SSF stash is shared only with your other SSF characters (masters, Atlas progress, and Trial of Ascendancy wins are also shared between your SSF chars).
Optional exit: You can turn off SSF for a character at any time. Once you do, the character moves to the regular non-SSF league permanently, and you keep your highest ladder rank—but future progress won’t count toward the SSF ladder.
How to Choose Solo Self-Found Builds in PoE 2 0.4?
Survivability first: Since you can’t trade for perfect gear, your build must handle damage early on. Life-based builds are usually better than energy shield (ES) builds—life is easier to get from leveling, strength stats, and common gear rolls. ES gear often needs multiple rare affixes, which are hard to find in SSF.
Self-sufficient damage: Choose skills that get stronger with level-ups (like spells or basic attacks) instead of skills that need specific unique items. Skills with area damage (AOE) are great for clearing packs, and single-target options help with bosses.
Easy resistance capping: Resistances (fire, cold, lightning, chaos) are crucial to surviving. Builds that can pick resistance nodes on the passive tree or use easy-to-craft gear for resistances will save you a lot of trouble.
Crafting-friendly: SSF means you’ll craft most of your gear. Builds that don’t need super rare mods (like “+3 to all skills”) are better. Essences are your best friend—they let you add guaranteed stats to gear early on.
No reliance on unique items: Unique items are rare in SSF. A good SSF build should work well with common rare gear, and only use uniques if you get lucky enough to find them.
Flexible skill gems: Skill gems that are easy to find or buy from quest rewards are better. Consider making a second character to get gems your main class can’t access (quest rewards vary by class).
Avoid builds that need specific drop-only uniques, rely on trading for currency, or have low defenses early on. SSF is a marathon, not a sprint—choose a build that grows with you.
Top 3 Best PoE 2 0.4 SSF Builds (2026)
After testing dozens of builds in PoE 2 0.4’s SSF mode, these three stand out for their ease of leveling, survivability, and endgame power. Each build uses simple mechanics, common gear, and flexible playstyles—perfect for SSF, where you rely only on what you find and craft.
1. Pohx’s Permafrost SSF Witchhunter (Ranged/Cold)
This build focuses on cold damage to freeze enemies, then detonates those freezes for massive area-of-effect (AOE) clear. It’s a straightforward 1-2 button setup, easy for new SSF players to learn, but strong enough to tackle red maps (the hardest endgame content). The Witchhunter ascendancy brings great utility, and late-game you’ll unlock Sorcery Ward to turn your squishy character into a tank.
Strengths
Freezes every enemy it hits, stopping them from attacking you and making crowd control effortless.
1-2 button clear mechanics—no complex rotations, so you can focus on moving and surviving.
Life-based early on, which is easy to sustain with level-ups, strength stats, and common gear rolls.
Late-game Sorcery Ward provides a 4k+ shield that blocks all damage types (fire, cold, lightning, physical, chaos).
Does not depend on rare unique items—performs well with crafted rares you can make in SSF.
Weaknesses
Squishy before unlocking Sorcery Ward (usually around level 80+), so you need to play carefully early on.
Crossbow reload mechanics take time to get used to—you’ll need to manage reloads to avoid being caught off-guard.
Requires investment in all three attributes (strength, dexterity, intelligence) to use key skills and gear.
Leveling Gear (Acts 1-4)
Crossbow: Any crossbow with high physical or cold damage. Prioritize faster attack speed if possible.
Armor: Basic gear like iron rings, chain mail, and mail sabatons—focus on life and resistances (fire, cold, lightning) to stay alive.
Level 20+: Upgrade to a Dyad Crossbow—it adds an extra bolt to your skills, making AOE clear much smoother.
Essences: Use Essence of Ice (easy to find in SSF) to add cold resistance or extra life to gear and cap your resistances early.
Endgame Gear (Maps + Red Maps)
Crossbow: Gemini Crossbow (best base for this build, as it adds an extra bolt). Craft it with these mods (Prefixes: 140% increased physical damage, 30% physical damage converted to cold, flat physical damage. Suffixes: +5 to projectile skills, 17%+ attack speed, chance to gain Onslaught on kill)
Body Armor: Evasion-based armor (aim for 13k+ evasion rating)—this makes Sorcery Ward much stronger.
Amulet: High spirit (to fit the Wind Dancer skill) + elemental resistances or cold damage.
Jewels: Heart of the Well Diamond (15% damage as cold, if you find it) or rare jewels with crossbow damage, cold penetration, or evasion.
Leveling Skills (Acts 1-4)
Active Skills:
Act 1: Permafrost Bolts (freezes enemies) + Fragmentation Rounds (detonates freezes).
Act 2: Add Herald of Ice (explodes frozen enemies for extra AOE damage).
Act 3: Unlock Freezing Mark (makes bosses easier to freeze) + Shard Scavenger (lets you shoot without reloading after detonating a freeze).
Act 4: Swap to the Tactician ascendancy for faster leveling; take the Supporting Fire node (deletes entire packs of monsters).
Support Gems:
Permafrost Bolts: Rapid Attacks (faster shooting) + Elemental Armament (more elemental damage).
Fragmentation Rounds: Elemental Armament + Cold Attunement (more cold damage).
Endgame Skills (Maps + Red Maps)
Active Skills:
Clear: Permafrost Bolts (main AOE skill).
Single Target: Fragmentation Rounds (boss killer) + Freezing Mark (boosts freeze chance on bosses).
Auras: Herald of Ice (extra AOE) + Thunderstorm (adds shock and lightning exposure for more damage).
Defenses: Sorcery Ward (massive shield) + Wind Dancer (increases evasion).
Support Gems:
Permafrost Bolts: Elemental Armament + Ice Bite (more cold damage) + Magnified Area (larger AOE).
Fragmentation Rounds: Concentrated Area (more single-target damage) + Close Combat (extra damage when near enemies).
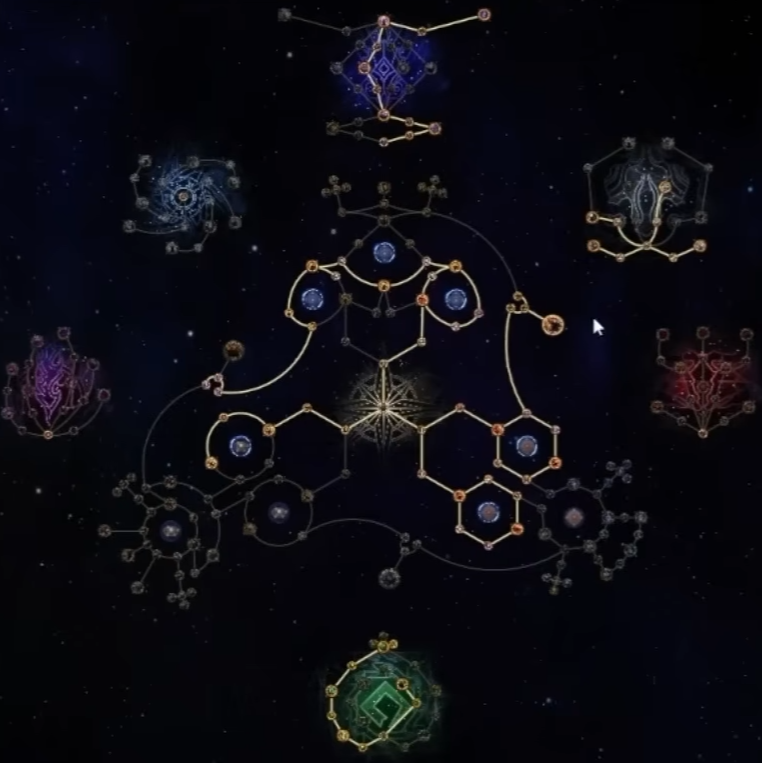
Passive Tree
Focus on life nodes, strength nodes (for extra life), and projectile speed nodes (makes Permafrost Bolts hit farther).
Prioritize projectile speed (critical for Permafrost Bolts to hit from a safe distance).
Add cold damage nodes, including cold penetration (ignores enemy cold resistance).
Respec some nodes to evasion once you unlock Sorcery Ward—evasion acts like extra “life” for your shield.
Grab nodes that boost attack speed and reduce reload time to fix the build’s main weakness.

2. Woolie’s Run n Gun Witchhunter (Ranged/Lightning)
This is a fast, mobile ranged build that spams lightning skills for quick AOE clear and boss kills. It’s perfect for players who love “run and gun” gameplay—you’ll move fast, shoot fast, and never feel stuck. Late-game, it becomes very tanky thanks to Sorcery Ward and evasion, and it has two variants to fit your playstyle (no rare uniques required).
Strengths
1-button clear: Spam Galvanic Shards + Herald of Thunder, and enemies will die quickly—no complex rotations.
Extremely fast movement and attack speed—playing it feels fun and fluid, great for clearing maps quickly.
Very tanky late-game: Sorcery Ward + high evasion (30% of your evasion becomes extra HP thanks to the Ceremonial Ablution ascendancy node).
Two variants (Stormblast and Shockburst) to adapt to your gear finds and playstyle—flexible for SSF.
Does not need rare unique items to perform well; crafted rares are more than enough.
Weaknesses
Crossbow reloads can be annoying early on—you’ll need lineage gems (found later in SSF) to fix this.
A bit squishy until you build up high evasion (usually around level 70+), so play carefully in early maps.
Mobile bosses can slightly mess up your single-target damage, as you’ll need to keep up with them while shooting.
Leveling Gear (Acts 1-4)
Crossbow: Rampart Raptor (OP for leveling—look for one with 3-4 sockets to link support gems). Add Lesser Glacial Runes (swap to regular Glacial Runes at level 15).
Rings: Blackheart Iron Rings (adds base damage) until you find rare rings with lightning or physical damage.
Armor: Focus on life and resistances (fire, cold, lightning)—use essences to cap your resistances early.
Boots: Prioritize movement speed if possible (use essences to craft it on basic boots).
Endgame Gear (Maps + Red Maps)
Crossbow: Rare crossbow with high physical/lightning damage, attack speed, and +level to projectile skills (easier to craft in SSF than unique weapons).
Body Armor: Skin of the Loyal (adds all elemental resistances, if you find it) or a rare evasion armor with life and resistances.
Boots: Wanderlust (adds movement speed, if you find it) or rare boots with movement speed and resistances.
Amulet: Rondel of Fragility (adds extra damage, if you find it) or a rare amulet with high spirit (to fit key skills) and resistances.
Anoint: Unbound Forces (cheaper, easy to get in SSF) or Acceleration (more damage, if you have the currency).
Leveling Skills (Acts 1-4)
Active Skills:
Acts 1-2: Start with Permafrost Bolts + Fragmentation Rounds (freeze and detonate enemies) to level quickly.
Act 3: Unlock Galvanic Shards (lightning AOE) + Herald of Thunder (passive lightning damage). Replace Permafrost Bolts with Galvanic Shards for clear.
Act 4: Get Stormblast Bolts (single-target skill) and proc it manually with Explosive Shot. Once you get a t11 gem, use Mortar Cannon + Explosive Grenade for better procs.
Support Gems:
Permafrost Bolts: Elemental Armament + Cold Attunement (more cold damage).
Galvanic Shards: Rapid Attacks (faster shooting) + Innervate (more spirit, to cast skills longer).
Endgame Skills (Maps + Red Maps)
Choose one of the two variants—Stormblast is recommended for SSF (easier to play):
Variant 1: Stormblast (Recommended for SSF)
Active Skills: Galvanic Shards (clear) + Stormblast Bolts (single target) + Mirage Archer (detonates Stormblast Bolts) + Herald of Thunder (AOE) + Attrition (slows enemies) + Sorcery Ward (defense) + Wind Dancer (evasion).
Support Gems:
Galvanic Shards: Rapid Attacks + Innervate + Magnified Area (larger AOE).
Stormblast Bolts: Elemental Armament + Close Combat + Execute (more boss damage).
Variant 2: Shockburst (Old, More Single-Target Damage)
Active Skills: Galvanic Shards (clear) + Shockburst Rounds (single target) + Plasma Blast (shocks enemies) + Herald of Thunder + Attrition + Sorcery Ward.
Support Gems:
Shockburst Rounds: Elemental Armament + Rapid Attacks + Close Combat.
Plasma Blast: Concentrated Area (more single-target damage).
Passive Tree
Focus on life nodes, attack speed nodes, and lightning damage nodes. Grab some spirit nodes to cast skills longer.
Prioritize attack speed and movement speed nodes to keep the “run and gun” playstyle fluid.
Add lightning damage and lightning penetration nodes (ignores enemy lightning resistance).
Grab evasion nodes to boost Sorcery Ward and Ceremonial Ablution (turns evasion into HP).
Add spirit nodes to fit all your skills (especially Mirage Archer, which needs extra spirit).

3. SSF Druid (Melee/Earth)
This melee build uses earth-themed skills (like Stone Strike and Earthen Bulwark) to deal high physical damage and tank hits. It’s perfect for players who prefer close-quarters combat—tough, straightforward, and ideal for SSF. The Druid adds sustainability (healing) and crowd control (stuns, slows), making it easy to clear acts and maps solo without rare gear.
Strengths
Super tanky: High life, physical damage reduction, and life leech (heal from damage) keep you alive in all content.
Satisfying melee combat: Smash enemies with stone fists—no clunky mechanics, just straightforward brawling.
Easy to level: No complex skill rotations; even new SSF players can pick it up quickly.
Uses common gear: No need for rare uniques—all gear can be found or crafted in SSF.
Great crowd control: Stuns (Tremor) and slows (Rooting Strike) keep enemies from overwhelming you.
Weaknesses
Slower movement speed than ranged builds—clearing maps takes a bit longer (but you’re tanky enough to compensate).
Single-target damage is good, but not as fast as ranged builds—boss fights take a few extra seconds.
Needs heavy strength investment (easy to get from the passive tree and gear) to use key skills and melee weapons.
Leveling Gear (Acts 1-4)
Weapon: Any melee weapon (axe, mace, or sword) with high physical damage. Maces are best for stuns.
Armor: Chain mail or plate armor (high armor rating) to block physical damage. Focus on life and strength.
Boots: Basic boots—use essences to craft movement speed if possible (helps with slower melee movement).
Resistances: Use essences to add fire, cold, and lightning resistance to gear—cap your resistances early to avoid dying to elemental damage.
Endgame Gear (Maps + Red Maps)
Weapon: Rare mace or axe (maces are preferred for stuns) with these mods (Prefixes: 150% increased physical damage, flat physical damage, extra strength. Suffixes: Attack speed, life leech, chance to stun enemies).
Body Armor: Rare plate armor with high life, armor rating, and elemental resistances (fire, cold, lightning).
Gloves: Firm Bracers (adds strength and physical damage) or rare gloves with attack speed and life.
Jewels: Rare jewels with physical damage, strength, life, or armor. If you find it, Heart of the Mountain (adds earth damage and armor) is a great upgrade.
Flasks: Life Flask (instant recovery for emergencies) + Stamina Flask (boosts movement and attack speed).
Leveling Skills (Acts 1-4)
Active Skills:
Act 1: Stone Strike (melee earth damage) + Earthen Bulwark (defensive shield that blocks damage).
Act 2: Unlock Tremor (AOE stun to control packs) + Life Leech (heal from damage).
Act 3: Get Rooting Strike (slows enemies) + Herald of Stones (adds physical damage and armor).
Act 4: Take the Earthshaker node (Druid ascendancy) to make Stone Strike explode for AOE damage.
Support Gems:
Stone Strike: Rapid Attacks (faster swings) + Physical Damage (more damage).
Tremor: Magnified Area (larger stun radius).
Endgame Skills (Maps + Red Maps)
Active Skills:
Clear: Stone Strike (main AOE skill, explodes thanks to Earthshaker).
Single Target: Heavy Strike (hard-hitting melee skill for bosses).
Defenses: Earthen Bulwark (shield) + Life Leech (healing) + Herald of Stones (extra armor and damage).
Crowd Control: Tremor (AOE stun) + Rooting Strike (slow).
Support Gems:
Stone Strike: Physical Damage + Explosive Strike (bigger explosions) + Rapid Attacks.
Heavy Strike: Concentrated Damage (more single-target damage) + Close Combat (extra damage when near enemies) + Execute (more damage to low-health bosses).
Passive Tree
Focus on strength nodes (for extra life and weapon damage), life nodes, and physical damage nodes. Grab some armor nodes to boost Earthen Bulwark.
Prioritize physical damage nodes, including physical penetration (ignores enemy physical resistance).
Add more life and armor nodes to stay tanky—melee builds need extra defense to survive close combat.
Grab attack speed nodes to make Stone Strike and Heavy Strike swing faster (fixes the build’s slow movement).
Add life leech nodes to boost healing—this makes you nearly unkillable in maps.