Diablo II Resurrected Season 14 brings significant changes to the game, primarily driven by the 3.2 PTR adjustments—most notably the heavy nerfs to the previously dominant Warlock class. While the Warlock is no longer the unbeatable force it was in Season 13, several of its builds remain viable, and some have even risen to prominence due to bug fixes and rebalanced synergies. Below, we’ve updated our guide to include 8 powerful D2R Season 14 builds after the 3.2 PTR.
D2R Ladder Season 14 & RotW Best Builds
While the Warlock was heavily nerfed in the 3.2 PTR, there are still strong Warlock builds in Season 14. Below are eight top-tier builds for different classes in D2R Ladder Season 14 and RotW expansion, updated with their post-PTR changes.
1. Hammerdin (Paladin)
The Hammerdin is the gold standard for D2R Season 14—versatile, fast, and easy to level. Blessed Hammer deals massive AoE damage that ignores enemy defense, making it perfect for clearing trash mobs and taking down bosses. It’s suitable for beginners, requires minimal gear to start, and scales effortlessly into endgame. With no major changes in the 3.2 PTR, it’s still the top choice for Ladder progression.
Core Mechanics & Skills
Blessed Hammer is the core damage skill, with Concentration (Aura) boosting its damage and Vigor (Aura) for mobility. Skill allocation prioritizes maxing Blessed Hammer, Concentration, and their synergies (Blessed Aim, Holy Shield). Holy Shield provides crucial defense, while Vigor keeps you moving quickly through zones.
Offensive Skills: Max Blessed Hammer, Max Concentration, Max Blessed Aim (synergy), Max Holy Shield (defense/synergy).
Defensive Skills: 1 point in Redemption (mana/health recovery), 1 point in Cleansing (status effect removal).
Auras: Concentration (main damage aura), Vigor (mobility), Salvation (for elemental resistance in endgame).
Gear Recommendations (Early to Late Game)
Early Game (Level 1-40): Spirit (Sword/Shield) for +skills and mana, Lore (Helm), Stealth (Chest), and a +1 Paladin Skills amulet. Use a basic mace with +Blessed Hammer.
Mid Game (Level 40-60): Upgrade to a Insight (Polearm) for your mercenary (mana regen), Vipermagi (Chest) for resistance, and a Shako (Helm) for +skills. Add Rings with mana leech and faster cast speed (FCR).
Late Game (Level 60+): Enigma (Chest) for Teleport, Call to Arms (Sword) for Battle Orders, and a Herald of Zakarum (Shield) for +Paladin Skills. Use a Grief (Sword) for melee backup, and add Annihilus and Hellfire Torch charms.
Farming Tips
Early on, clear Act 1 and Act 2 areas (e.g., Tristram, Tower Cellar) with Blessed Hammer. Once you have Enigma, farm Chaos Sanctuary, Cow Level, and Terror Zones for runes and gear. The Hammerdin’s AoE damage makes it one of the fastest farmers in the game—focus on areas with dense mobs to maximize efficiency.
2. Lightning Sorceress
The Lightning Sorceress is the fastest leveling build in Diablo 2 Season 14, thanks to its high mobility (Teleport) and devastating AoE damage. Lightning spells (Lightning, Chain Lightning, Nova) melt trash mobs and bosses alike, and with minimal gear, she can clear zones faster than most builds. A top-tier choice for players looking to rush ladder or farm efficiently.
Core Mechanics & Skills
Chain Lightning is the primary AoE skill (great for clearing groups), while Lightning is for single-target damage. Nova is an optional late-game addition for dense mobs. Teleport is non-negotiable for mobility, and Energy Shield provides defense to keep her alive.
Offensive Skills: Max Chain Lightning, Max Lightning, Max Nova (optional), Max Lightning Mastery (synergy for damage).
Defensive Skills: Max Energy Shield, 1 point in Teleport, 1 point in Static Field (reduces enemy health).
Prerequisites: Invest the minimum points needed to unlock Chain Lightning and Lightning Mastery.
Gear Recommendations (Early to Late Game)
Early Game (Level 1-40): Spirit (Sword/Shield), Lore (Helm), Stealth (Chest), and a +1 Sorceress Skills amulet. Use a basic staff with +Lightning skills.
Mid Game (Level 40-60): Upgrade to a Crescent Moon (Sword) for -Lightning Resistance, Skin of the Vipermagi (Chest), and a Shako (Helm). Add Rings with mana leech and FCR.
Late Game (Level 60+): Enigma (Chest) for Teleport, Call to Arms (Sword) for Battle Orders, and a Griffon’s Eye (Helm) for -Lightning Resistance. Use a Spirit shield for +skills, and add Annihilus and Hellfire Torch charms. Mercenary: Insight (Polearm) for mana regen.
Farming Tips
Use Teleport to skip unnecessary mobs and focus on dense areas like Arcane Sanctuary (runes), Cow Level (gear), and Chaos Sanctuary (bosses). Static Field is key for bosses—reduce their health to 50% in one cast before finishing them off with Lightning or Chain Lightning. For Terror Zones, prioritize areas with high mob density (e.g., Worldstone Keep) to maximize clears per hour.
3. Javazon (Amazon)
The Javazon (Javelin Amazon) is a fun, high-damage build that excels at both AoE and single-target damage. Her Javelin skills (Lightning Fury, Charged Strike) deal massive elemental damage, and her mobility (Valkyrie, Decoy) makes her safe to play. No PTR changes mean she’s still a strong choice for players who want a build that’s both effective and engaging.
Core Mechanics & Skills
Lightning Fury is the core AoE skill (chains lightning to multiple enemies), while Charged Strike is for single-target boss damage. Valkyrie acts as a tank to distract enemies, and Decoy draws aggro. Critical Strike and Penetrate boost damage and accuracy.
Offensive Skills: Max Lightning Fury, Max Charged Strike, Max Critical Strike, Max Penetrate (synergy for accuracy).
Defensive Skills: Max Valkyrie (tank), 1 point in Decoy (aggro), 1 point in Dodge/Evade/Avoid (survivability).
Prerequisites: Invest the minimum points needed to unlock Lightning Fury and Charged Strike.
Gear Recommendations (Early to Late Game)
Early Game (Level 1-40): Titan’s Revenge (Javelin) (if available), Lore (Helm), Stealth (Chest), and a +1 Amazon Skills amulet. Use a basic shield for defense.
Mid Game (Level 40-60): Upgrade to a Thunderstroke (Javelin), Vipermagi (Chest), and a Shako (Helm). Add Rings with mana leech and FCR.
Late Game (Level 60+): Enigma (Chest) for Teleport, Call to Arms (Sword) for Battle Orders, and a Griffon’s Eye (Helm) for -Lightning Resistance. Use a Spirit shield for +skills, and add Annihilus and Hellfire Torch charms. Mercenary: Insight (Polearm) for mana regen.
Farming Tips
Early on, clear Act 3 and Act 4 areas (e.g., Kurast Bazaar, River of Flame) with Lightning Fury. Once you have Enigma, farm Cow Level (massive mob density) and Chaos Sanctuary (bosses). Use Valkyrie and Decoy to tank enemies while you spam Lightning Fury—this keeps you safe and allows you to clear mobs quickly. For single-target bosses, switch to Charged Strike for maximum damage.
4. Trap Assassin
The Trap Assassin is a safe, low-maintenance build that excels at clearing trash mobs and bosses. Her traps (Lightning Sentry, Death Sentry) deal massive AoE damage, and she can stay at a distance while the traps do the work. This build is easy to play and effective in all content.
Core Mechanics & Skills
Lightning Sentry is the primary AoE trap (chains lightning to nearby enemies), while Death Sentry is for clear corpses and dealing extra damage. Wake of Fire is an optional early-game trap for fire damage. Shadow Master acts as a tank to distract enemies.
Offensive Skills: Max Lightning Sentry, Max Death Sentry, Max Wake of Fire (optional), Max Lightning Sentry synergies (Shock Web, Charged Bolt Sentry).
Defensive Skills: Max Shadow Master (tank), 1 point in Burst of Speed (mobility), 1 point in Fade (resistance).
Prerequisites: Invest the minimum points needed to unlock Lightning Sentry and Death Sentry.
Gear Recommendations (Early to Late Game)
Early Game (Level 1-40): Spirit (Claw/Shield), Lore (Helm), Stealth (Chest), and a +1 Assassin Skills amulet. Use basic claws with +Trap skills.
Mid Game (Level 40-60): Upgrade to a Death’s Web (Wand) (for +Poison and Bone skills, optional), Vipermagi (Chest), and a Shako (Helm). Add Rings with mana leech and FCR.
Late Game (Level 60+): Enigma (Chest) for Teleport, Call to Arms (Sword) for Battle Orders, and a Griffon’s Eye (Helm) for -Lightning Resistance. Use a Spirit shield for +skills, and add Annihilus and Hellfire Torch charms. Mercenary: Insight (Polearm) for mana regen.
Farming Tips
Early on, clear Act 2 and Act 3 areas (e.g., Tower Cellar, Kurast Sewers) with Wake of Fire and Lightning Sentry. Once you have Enigma, farm Chaos Sanctuary, Cow Level, and Terror Zones. Place traps in dense mob areas and use Shadow Master to tank enemies—this allows you to clear mobs without taking damage. Death Sentry is key for clear corpses and dealing extra damage to remaining enemies.
5. Bone Necromancer
The Bone Necromancer is a scalable, safe build that excels at endgame content. His bone spells (Teeth, Bone Spear, Bone Spirit) deal massive magic damage, and since magic resistance is rare among enemies, almost no enemy is immune to his attacks. While he doesn’t one-shot everything early on like the Hammerdin, he’s incredibly safe (cast from a distance) and grows into an unstoppable endgame force.
Core Mechanics & Skills
This build uses Teeth for clearing trash mobs, Bone Spear for AoE damage, and Bone Spirit for single-target boss damage. Bone Spear pierces infinitely, making it great for clearing groups, while Bone Spirit never misses—perfect for taking down bosses. Skill allocation:
Offensive Skills: Max Bone Spear, Max Bone Spirit, Max Teeth, Max Bone Wall (synergy for Bone Spear damage), Max Bone Prison (synergy for Bone Spirit damage).
Defensive Skills: 1 point in Raise Skeleton (for a tanky distraction), 1 point in Clay Golem (for slowing enemies), 1 point in Golem Mastery (to make the Golem stronger).
Prerequisites: Invest the minimum points needed to unlock Bone Spear and Bone Spirit.
Gear Recommendations (Early to Late Game)
The Bone Necromancer needs +Necromancer Skills, mana leech, and faster cast speed. Here’s a gear path:
Early Game (Level 1-40): Spirit (Wand/Shield) for +skills and mana, Lore (Helm), Stealth (Chest), and a +1 to Necromancer Skills amulet. Use a basic Wand with +Bone skills.
Mid Game (Level 40-60): Upgrade to a White (Wand rune word: Dol + Io) for +Bone skills and damage, a Vipermagi (Chest) for resistance, and a Shako (Helm) for +skills. Add Rings with mana leech and FCR.
Late Game (Level 60+): Enigma (Chest) for Teleport, Call to Arms (Wand) for Battle Orders, and a Death’s Web (Wand) for +Poison and Bone skills. Use a Spirit shield for maximum +skills, and add Annihilus and Hellfire Torch charms.
Farming Tips
Early on, use Teeth to clear trash waves in areas like Tower Cellar and Arcane Sanctuary. Once you have Bone Spear, farm Chaos Sanctuary and Cow Level. For bosses (Mephisto, Diablo, Baal), use Bone Spirit—its guaranteed hit makes it easy to take down even the toughest enemies. The Necromancer’s Golem and Skeletons help tank enemies, so you can cast safely from a distance.
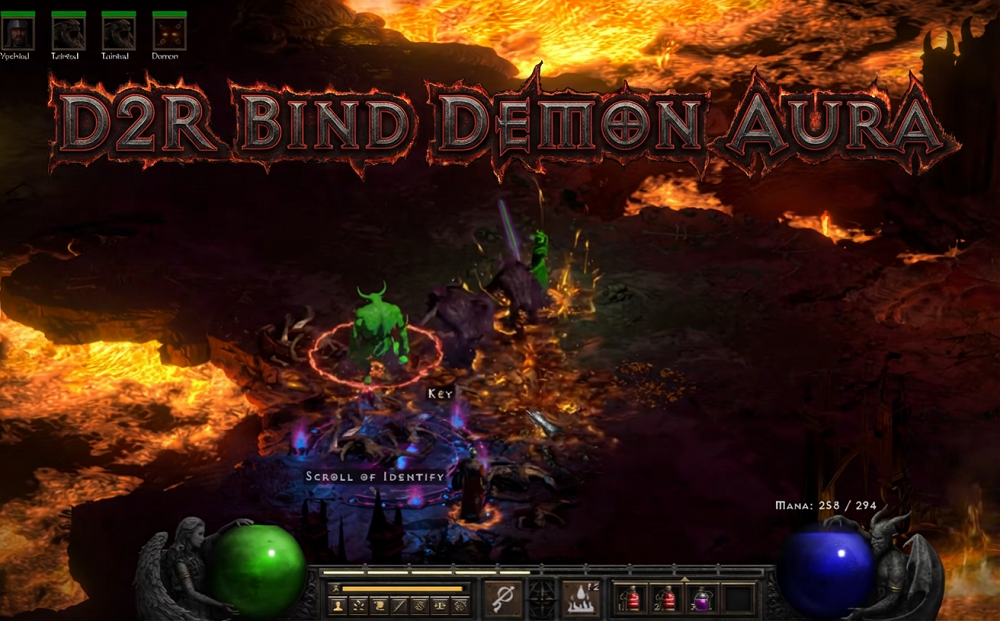
6. Echoing Strike Warlock
The Echoing Strike Warlock underwent massive changes in the D2R 3.2 PTR—most of which are bug fixes that were mistakenly absent at the Warlock’s launch. Despite these adjustments (often perceived as nerfs), the build remains viable, though it’s no longer the overpowered force it was pre-PTR. It now requires more strategic gear and skill allocation, but its fast, rapid-attack playstyle and high damage potential (when optimized) keep it relevant in Season 14. Notably, calculations suggest it now deals roughly 10% of its pre-PTR damage, but careful theorycrafting can still make it a competitive choice for players who enjoy its melee-adjacent playstyle.
Key PTR Changes Impacting Echoing Strike
Fixed hit check (now requires Attack Rating/AR), weapon durability usage, synergy damage reduced from 5% to 3%, damage changed from multiplicative to additive (now deals ~22.5% of pre-PTR single-target damage), Sigil Lethargy’s physical resistance debuff removed, Bind Demon now requires hard points for unique/super unique demons, aura pool for bound demons reduced, and Warlocks can no longer use shields with two-handed weapons (only Grimoires/Tomes).
Core Mechanics & Skills
Echoing Strike is the core skill—fast, rapid attacks that now rely on AR to hit enemies. The build’s success hinges on mitigating the PTR changes: using skills to boost AR, choosing indestructible weapons to avoid durability issues, and optimizing synergies and bound demons for damage. Skill allocation now requires more tradeoffs, as Bind Demon and Demonic Mastery need hard points, competing with Echoing Strike and its synergies.
Offensive Skills: Max Echoing Strike, Max Mirrored Blades (synergy, now +3% damage per point), Max Blade Warp (synergy, now +3% damage per point), 1 point in Hex Purge (adds AR), 1 point in Hex Bane (adds AR).
Defensive/Utility Skills: Max Sigil Lethargy (reduces enemy defense to boost AR—critical post-PTR), 1 point in Levitation Mastery (mobility), 1 point in all Sigils (for utility).
Demon Tree: 15 Hard Points in Bind Demon (to bind unique demons for auras/curses), 5-10 Hard Points in Demonic Mastery (to unlock 2-3 active demons), 1 point in Consume (for buffs), 1 point in Defiler (optional tank).
Gear Recommendations (Early to Late Game)
Gear focus shifts to AR, indestructible weapons (to avoid durability loss), +Warlock Skills, and mana leech. Ethereal weapons are now risky (unless indestructible), and two-handed weapons must be paired with Grimoires/Tomes (no shields).
Early Game (Level 1-40): Spirit (Wand/Grimoire) for +skills and mana, Lore (Helm), Stealth (Chest), +1 Warlock Skills amulet, and a basic indestructible Wand with +Echoing Strike. Prioritize AR on rings/gloves.
Mid Game (Level 40-60): White (Wand rune word: Dol + Io) for +Echoing Strike skills, Vipermagi (Chest) for resistance, Shako (Helm) for +skills, and rings with AR and mana leech. Use Obsession (indestructible weapon) to avoid durability issues.
Late Game (Level 60+): Enigma (Chest) for Teleport, Call to Arms (Wand) for Battle Orders, Death’s Web (Wand) for +Poison/Bone skills (synergizes with flat damage), and Ozul Diabolos (Grimoire) for +Chaos skills and fire damage. Use Spirit Grimoire for +skills, and add Annihilus and Hellfire Torch charms. Mercenary: Insight (Polearm) for mana regen; Infinity (optional, for -enemy resistance).
Farming Tips
Early on, clear low-difficulty areas (Tower Cellar, Arcane Sanctuary) with Echoing Strike, using Sigil Lethargy to reduce enemy defense and Hex Purge/Hex Bane to boost AR. Avoid ethereal weapons unless they’re indestructible—frequent durability loss will require frequent town visits, slowing farming. Mid-to-late game, farm Chaos Sanctuary and Cow Level (dense mobs for Echoing Strike’s rapid attacks). For bosses, use bound demons with Holy Freeze (to proc Amplify Damage, now 5% chance) and Sigil Lethargy to ensure hits. Focus on mobs with low defense to maximize AR efficiency.
7. Fire Apocalypse Warlock
The Fire Apocalypse Warlock rose to prominence in the 3.2 PTR due to the nerf of other Warlock builds (Echoing Strike, old Fire Warlock variants). This build focuses on Chaos Fire skills (Ring of Fire, Flame Wave, Apocalypse) for massive AoE fire damage, with strong scaling from +skills and enemy fire resistance reduction. It’s visually striking, fun to play, and excels at clearing dense mobs—making it a top choice for Season 14. While it requires expensive endgame gear to reach its full potential, it’s viable from early leveling to endgame and competes with S-tier builds like the Hammerdin on Players 8 difficulty.
Core Mechanics & Skills
The build’s core is three Chaos Fire skills: Apocalypse (massive AoE fire damage, large radius), Flame Wave (sustained AoE damage), and Ring of Fire (early-game AoE). Skill allocation focuses on maxing these skills and their synergies, with the Demon Tree used for utility (tank demons, buffs) rather than primary damage.
Offensive Skills: Max Ring of Fire, Max Flame Wave, Max Apocalypse (core trio), 1 point in all Sigils (to unlock Apocalypse, plus utility like Sigil Death for extra damage).
Demon Tree: 1 point in all Demon skills (Bind Demon, Consume, Defiler, Tainted Summon), 5 Hard Points in Demonic Mastery (to unlock 2 active demons), remaining points in Consume (for max life, run speed, and buff duration) or Blood Earth (to share damage with bound demon).
Hybrid Variant (Tainted/Fire): After maxing Fire skills, max Tainted Summon and its synergy Blood Boil (for supplementary fire damage from summons), plus additional Demonic Mastery to unlock 3 Tainted Summons.
Stats: Enough Strength for gear (163 total for Wraith Step boots, ~55 base with Enigma/Torch/Annihilus), rest into Vitality (survivability).
Gear Recommendations (Early to Late Game)
Gear prioritizes +Warlock/Chaos Skills, -enemy fire resistance, FCR, and mana management. Endgame gear is expensive but highly impactful—focus on stacking +skills to boost Apocalypse and Flame Wave damage.
Early Game (Level 1-40): Spirit (Wand/Grimoire), Lore (Helm), Stealth (Chest), +1 Warlock Skills amulet, and a basic Wand with +Fire skills. Use Fire Resistance gear to handle early fire enemies.
Mid Game (Level 40-60): Mang Song’s Lesson (Wand) for +skills and -enemy fire resistance, Vipermagi (Chest) for resistance, Shako (Helm) for +skills, and Mage Fist (Gloves) for FCR and +Fire skills. Add Stone of Jordan (Ring) for +skills and mana.
Late Game (Level 60+): Enigma (Chest) for Teleport, Call to Arms (Wand) for Battle Orders, Mang Song’s Lesson (best-in-slot Wand for -fire resistance and +skills), Ozul Diabolos (Grimoire) for +5 Apocalypse, +2 Chaos Skills, and 25% fire damage. Helm: Flickering Flame (for -fire resistance) or 2/20 Cirlet with Fire Facets. Amulet: 2/20 Warlock Amulet (ideal, expensive) or +3 Chaos Skills. Gloves: Mage Fist; Belt: Arachnid Mesh (FCR + +skills); Boots: Wraith Step (+1 Chaos Skills); Rings: Stone of Jordan + Opal Vein (fire damage). Inventory: Flame Rift Sunder Charm (sunder fire immunities), Chaos Skillers, and +All Stats small charms. Mercenary: Infinity (Polearm) for -enemy resistance, Chains of Honor (Chest), Cure Helm.
Farming Tips
Early on, clear Act 1-2 areas (Tristram, Tower Cellar) with Ring of Fire and Flame Wave. Once you have Apocalypse, focus on dense mob areas: Arcane Sanctuary (runes), Cow Level (gear), and Chaos Sanctuary (bosses). Use Sigil Lethargy for crowd control and to reduce enemy defense. For fire-immune enemies, rely on your mercenary (Infinity) and Sunder Charm to break immunities. On Players 8/Terror Zones, Apocalypse melts non-immune mobs, while Flame Wave handles stragglers. The hybrid Tainted/Fire variant lets you summon Tainted to tank and deal supplementary damage—stay in the background and cast Fire skills for a safe, relaxed playstyle (ideal for Hardcore).
8. Tainted Summoner Warlock (Tainted/Blood Boil Hybrid)
The Tainted Summoner Warlock is arguably the most powerful Warlock build in the D2R RotW 3.2 —unlocked by a fixed bug where Blood Boil now synergizes with Tainted Summon (previously non-functional). This build uses Tainted Summons (powerful fire-damage summons) boosted by Blood Boil’s synergy (+30% fire damage per Blood Boil point) and a hybrid of Blood Boil (physical damage) to handle immunities. It’s overpowered in its current state (dealing ~100k+ combined damage from 3 Tainted Summons) and excels at both single-target and AoE damage, with a relaxed playstyle (summons do most of the work). While it may receive nerfs in future patches, it’s a top-tier choice for Season 14.
Core Mechanics & Skills
The build’s success hinges on the fixed Blood Boil → Tainted Summon synergy: each point in Blood Boil grants +30% fire damage to Tainted Summons, resulting in exponential damage scaling. Tainted Summons are the primary damage dealers, while Blood Boil handles fire-immune enemies. The Demon Tree is prioritized for summon strength, with minimal investment in other trees.
Offensive Skills: Max Tainted Summon (core summon), Max Blood Boil (synergy for Tainted damage + physical damage for immunities), Max Blood Oath (synergy for Blood Boil), Max Engorg (synergy for Blood Boil + buffs), 1 point in all Sigils (utility, Sigil Death for extra damage).
Demon Tree: Max Demonic Mastery (to unlock 3 active Tainted Summons—requires hard points), 1 point in Bind Demon (optional tank), 1 point in Defiler (optional tank).
Utility Skills: 1 point in Levitation Mastery (mobility), 1 point in Death Mark (teleport summons to mobs—critical for positioning).
Stats: Enough Strength for gear, rest into Vitality (survivability—summons handle tanking, so you only need to avoid direct damage).
Gear Recommendations (Early to Late Game)
Gear focuses on +Warlock/Demon Skills (to boost Tainted Summon level and damage), +fire damage, and mana management. Unlike the Fire Apocalypse build, it’s viable with mid-tier gear, though endgame gear amplifies its power exponentially.
Early Game (Level 1-40): Spirit (Wand/Grimoire), Lore (Helm), Stealth (Chest), +1 Warlock/Demon Skills amulet, and a basic Wand with +Demon skills. Prioritize +skills to boost Tainted Summon damage.
Mid Game (Level 40-60): Mang Song’s Lesson (Wand) for +skills, Shako (Helm), Vipermagi (Chest), Mage Fist (Gloves) for FCR, and Stone of Jordan (Ring) for +skills and mana. Use Ozul Diabolos (Grimoire) for +Chaos/Demon skills.
Late Game (Level 60+): Enigma (Chest) for Teleport, Call to Arms (Wand) for Battle Orders, Mang Song’s Lesson (Wand) or Obsession (for defensive stats), Ozul Diabolos (Grimoire) (best-in-slot for +skills and fire damage). Helm: Shako or 2/20 Cirlet with +Demon skills. Amulet: 2/20 Warlock Amulet or +3 Demon Skills. Belt: Arachnid Mesh (FCR + +skills); Boots: Wraith Step (+1 Demon Skills); Rings: Stone of Jordan + +skills ring. Inventory: Flame Rift Sunder Charm (sunder fire immunities), Demon Skillers, and +All Stats small charms. Mercenary: Infinity (Polearm) for -enemy resistance, Chains of Honor (Chest), Cure Helm. Optional: Self-wield Infinity (if mana issues, put Insight on mercenary).
Farming Tips
This build is one of the fastest farmers in Season 14—summon 3 Tainted Summons (with Demonic Mastery), use Death Mark to teleport them to mobs, and let them annihilate enemies. Early on, clear Act 2-3 areas (Canyon of the Magi, Spider Forest) with Tainted Summons and basic Blood Boil. Mid-to-late game, farm Cow Level (dense mobs), Chaos Sanctuary (bosses), and Terror Zones (Players 8 is manageable). For fire-immune enemies, use Blood Boil (melee-range physical damage) to supplement summon damage—teleport in, cast Blood Boil, and let summons finish the job. The playstyle is relaxed: buff with Call to Arms, summon Tainted, and teleport around to position summons. It’s ideal for Hardcore (safe, minimal direct combat) and solo farming (no need for parties to clear Players 8).